AspCoreGen 3.0 Razor Express is a free ASP.NET Core 3.1 Razor Page Code Generator software you can download absolutely free. AspCoreGen 3.0 Razor Express
generates a full solution with 2 projects; An ASP.NET Core 3.1 Razor Page Web Application project (main application - UI), and a .NET Core 3.1 Class Library Project (business tier, data tier, and shared libraries). The
optional ASP.NET Core 3.1 Web API project can only be generated using the Professional Plus Edition. It generates code by looking at your Microsoft SQL Server Database's tables (and Database Views for Pro Plus only).
The major objects generated are:
- Razor Pages (.cshtml)
- Razor Page Models (.cshtml.cs)
- Middle-Tier code (class)
- Data Tier code (class)
- Models (class)
- Miscellaneous items
- Items that make up the rest of the Web Application project. E.g. Layout page, helper classes, css, images, javascript, jquery, and a lot more.
Unlike the Professional Plus Edition, the Express Edition is limited. One of the main differences is the later will only generate Unbound Razor Pages, these
are Razor Pages not bound to the database. In the page shown
here, there are 19 generated Razor Pages (per database table), only
1 is generated by the Express Edition (#18, Unbound Razor Pages). Even with this limitation, the amount of code generated is absolutely outstanding. It can generate about a million lines of code in about
a minute depending on the amount of tables (or views) you have in the database, and it can do all these in One Click**.
Because the generated code for the Express Edition is not connected to the database, this tutorial will show you how to add your own code to connect the generated Razor Page(s) to the database.
Now that I'm done with my spiel let's get on with the tutorial.
You need the following things for this tutorial:
- - Microsoft Northwind Database (please Google it)
- - Microsoft SQL Server 2003 and above
- - You will need a User with an Admin username/password or with enough rights in the MS SQL Server (or Azure SQL). A blank username/password will not work.
- - Visual Studio 2019 (the generated code will not work in Visual Studio 2017 and below)
- - AspCoreGen 3.0 Razor Express
1. Download AspCoreGen 3.0 Razor Express here:
https://junnark.com/Products/AspCoreGen3Razor/DownloadExpress.
2. Install it. Just follow all the prompts. If you need a tutorial go here:
https://junnark.com/Products/AspCoreGen3Razor/Tutorials and click on the Installation Guide link.
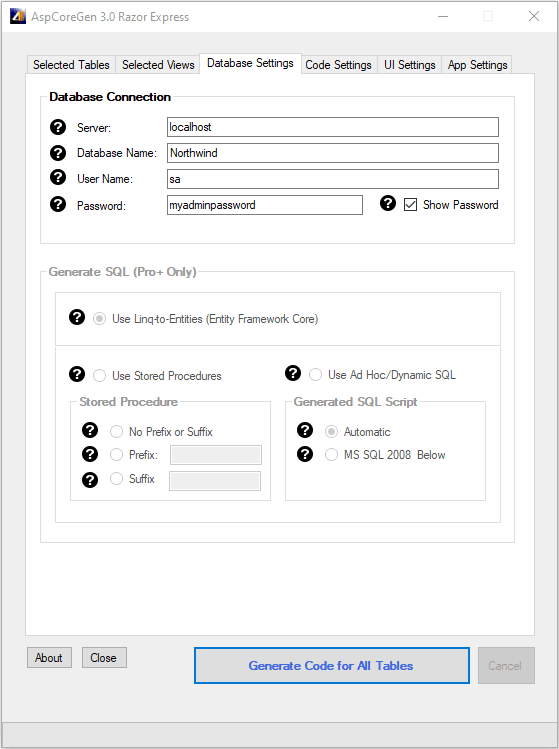
3. Open AspCoreGen 3.0 Razor Express, go to the
Database Settings tab and enter the following information shown in the snapshot below.
Note: Use your database's username and password instead of the one's shown below. A blank password will not work.
4. Go to the
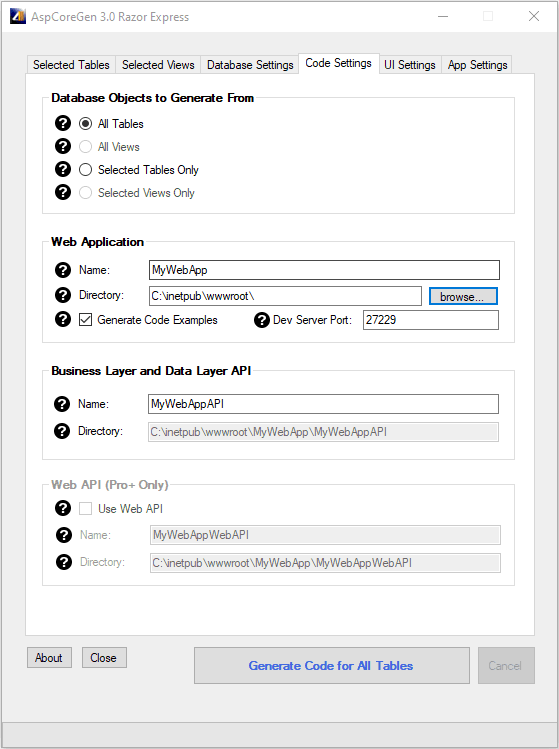
Code Settings tab and enter the
Web Application Name, and the
Directory where you want the generated code to be in. You can use the browse button next to the
Directory Box to choose the
directory where you want the code to be generated. You can keep the suggested
Business Layer and Data Layer API (Class Library Project) Name or change it, it's up to you.
5. Click the
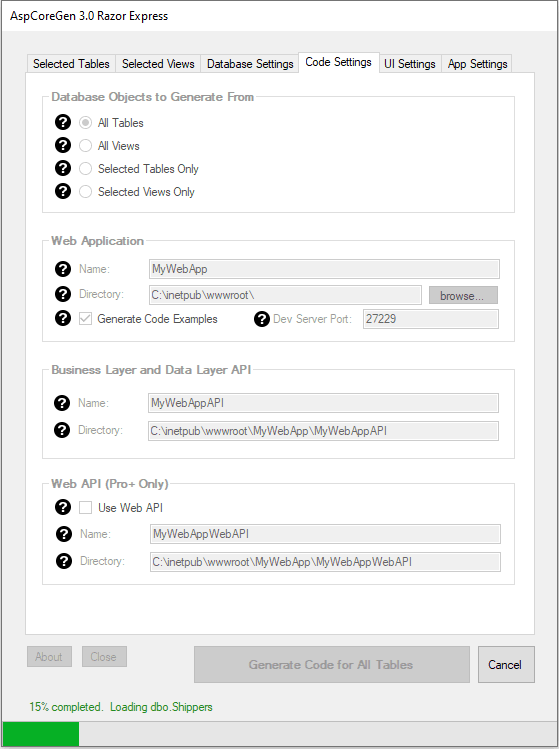
Generate Code for All Tables or the
Generate Code for Selected Tables Only button. AspCoreGen 3.0 Razor Express will start generating code and you will see a message once code generation is done.
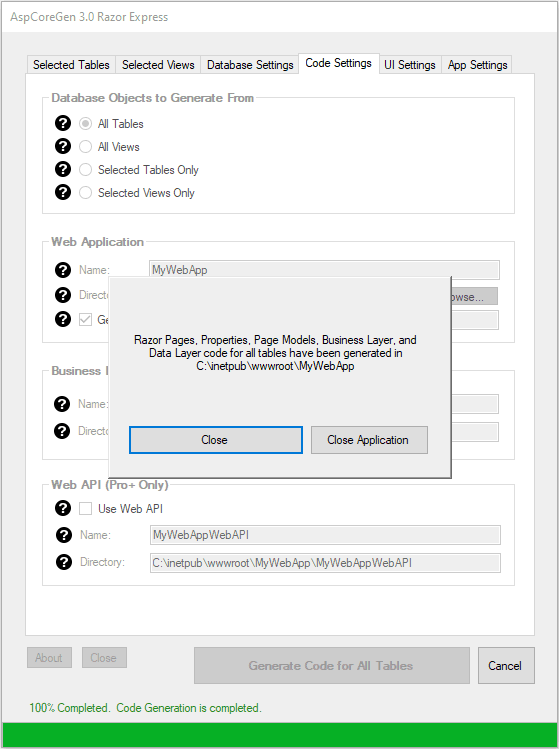
6. Click the
Close or
Close Application button. Go to the
Directory you specified and double-click the Solution file (.sln).
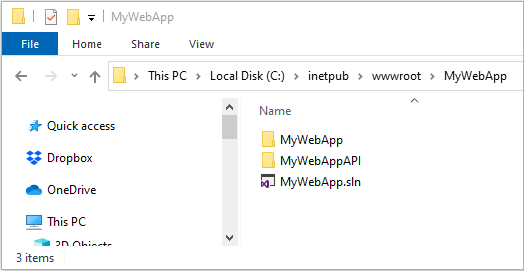
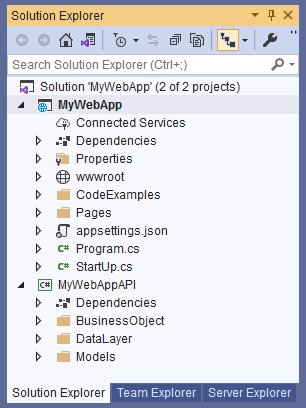
7. The solution will open in Visual Studio 2019. The Visual Studio Solution Explorer window shows 2 generated projects in the solution. Run the web application by pressing F5.
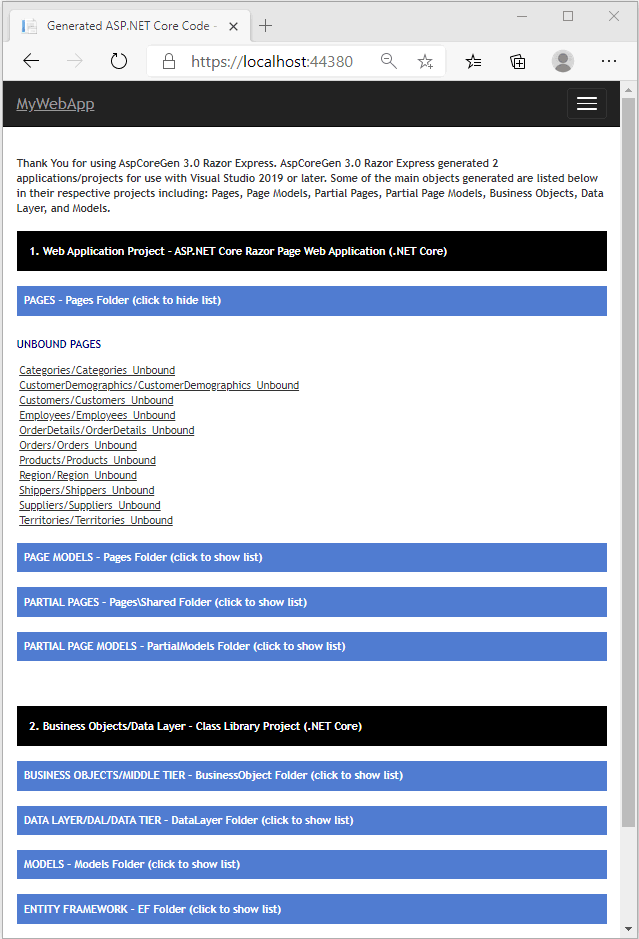
8. The home page shows all the major objects that was generated by AspCoreGen 3.0 Razor Express. The black bars represents the separate projects. Below each black bar are categories of
objects (blue bar) generated for that specific project. Clicking the blue bar will toggle visibility of the list of items for that category. Items under the
Pages Folder are Razor Pages (.cshtml) and are clickable to
demonstrate each Razor Page's functionality.
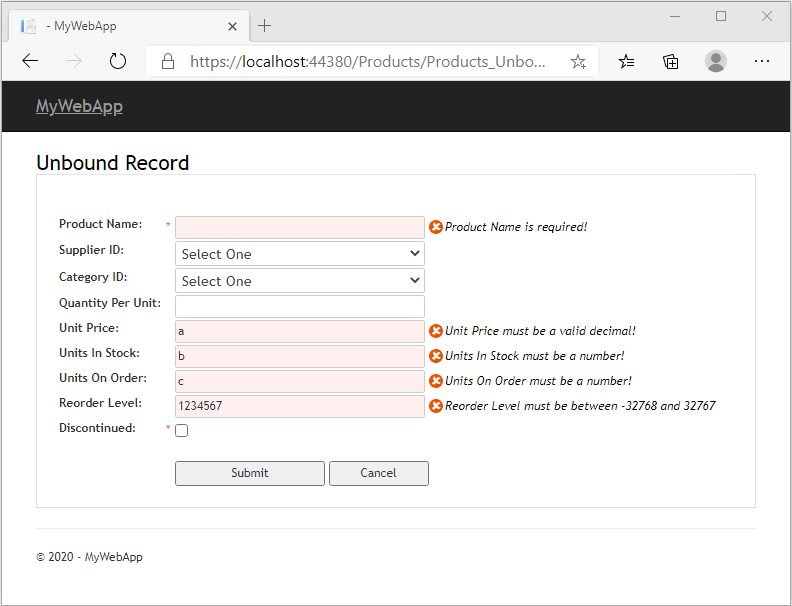
9. Click on one of the web page links, e.g. the
/Products/Products_Unbound. You will notice that each field in the
Products database table is
shown here. Foreign keys are also shown as a Select List web control. There's also validation, for example Product Name here is a
required field. Note: AspCoreGen 3.0 Razor Express generates Unbound Razor Pages, these are Razor Pages that are not bound to a database. Because these Razor Pages are not bound to the database, you will notice that
the Select List for the Supplier ID and Category ID does not have data, and when you click the Submit button nothing happens, it will not Insert or Update something in the database.
10. Close the web page and then go back to Visual Studio.
11. Since AspCoreGen 3.0 Razor Express does not generate code that binds razor pages to the database, let's bind the Razor Page to the database by adding
logic to the
Products_Unbound.cshtml.cs (Razor Page Model) under the
Pages/Products folder. Open the class
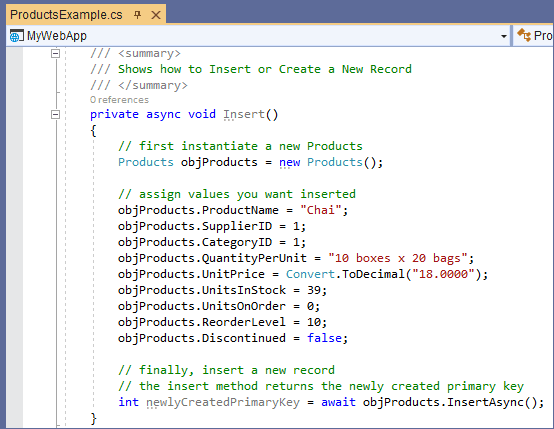
ProductsExample.cs under the
CodeExamples folder and then copy the code from
the
Insert method to the
Products_Unbound.cshtml.cs (Razor Page Model)
OnPostSubmit method.
Note: We will use a Layering approach (3-tier, n-tier), so, the Razor Page (Presentation Layer/Front End) will access the
Products.cs (Business Object), and then the
Product.cs
will access the
ProductsDataLayer.cs (Data Layer) code. The Data Layer code would then access our database (MS SQL).
Products Example Class, Insert Method
 Products_Unbound.cshtml.cs (Razor Page Model) - OnPostSubmit Method
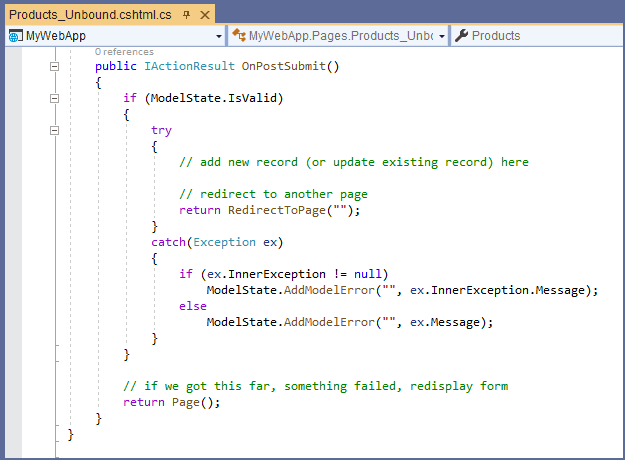
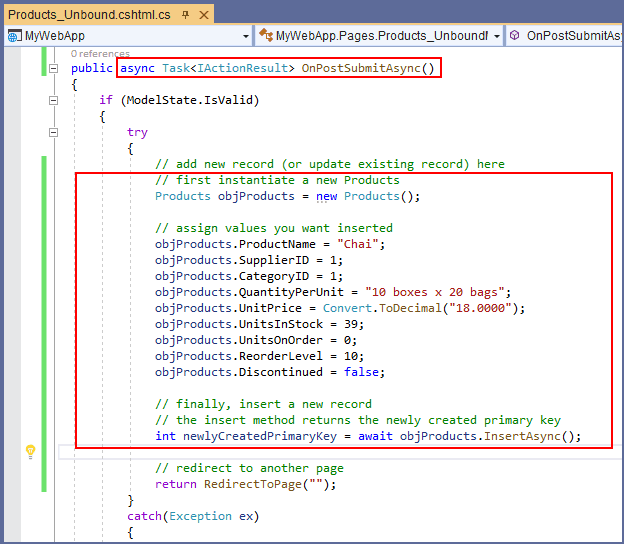
12. Copy all the code from the Insert Example Method in the
ProductsExample.cs to the
Products_Unbound.cshtml.cs (Razor Page Model)
OnPostSubmit method as shown below.
As shown and highlighted below, add the
async Task<> keyword to the
OnPostSubmit method's return value, and rename the
OnPostSubmit method to
OnPostSubmitAsync.
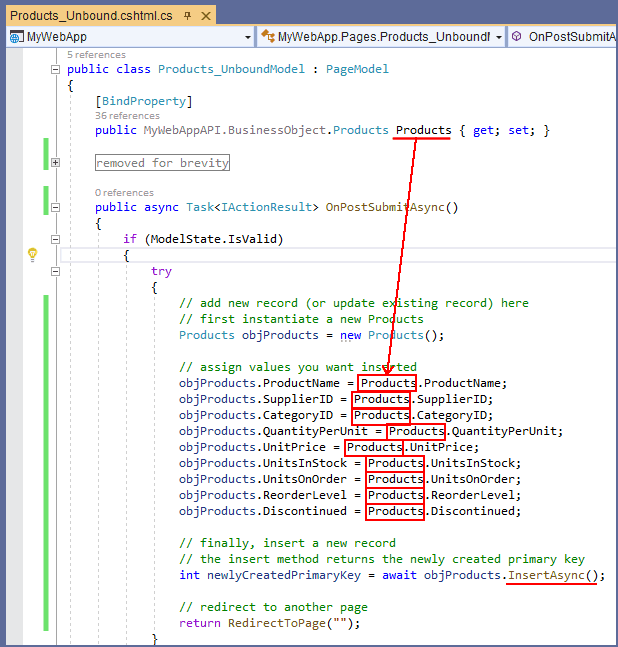
13. Update the hard-coded sample values using the
Products property bound by the Razor Page. The underlined code below accesses the Products's
InsertAsync (Business Object) method. In short, the
Razor Page Model which is a part of the
Front End accesses the
Middle Layer (Business Object).
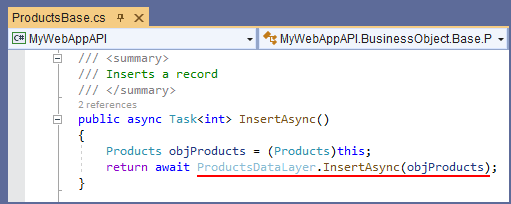
14. The Products's
InsertAsync (Business Object) method in the MyWebAppAPI (Class Library) project under the BusinessObject/Base folder accesses it's respective Data Layer method as shown in the highlighted code below.
15. Note that the Products's
InsertAsync Data Layer method in the MyWebAppAPI (Class Library) project under the DataLayer/Base folder shown below has no code, just a code throwing a NotImplementedException error. This is one of the main difference with AspCoreGen 3.0 Razor Express and
Professional Edition, that's why Express generated Razor Pages are not bound to a database.
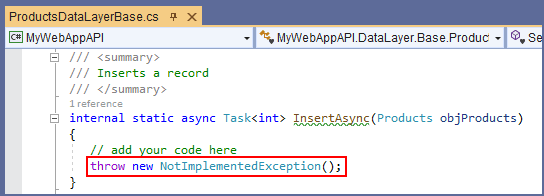
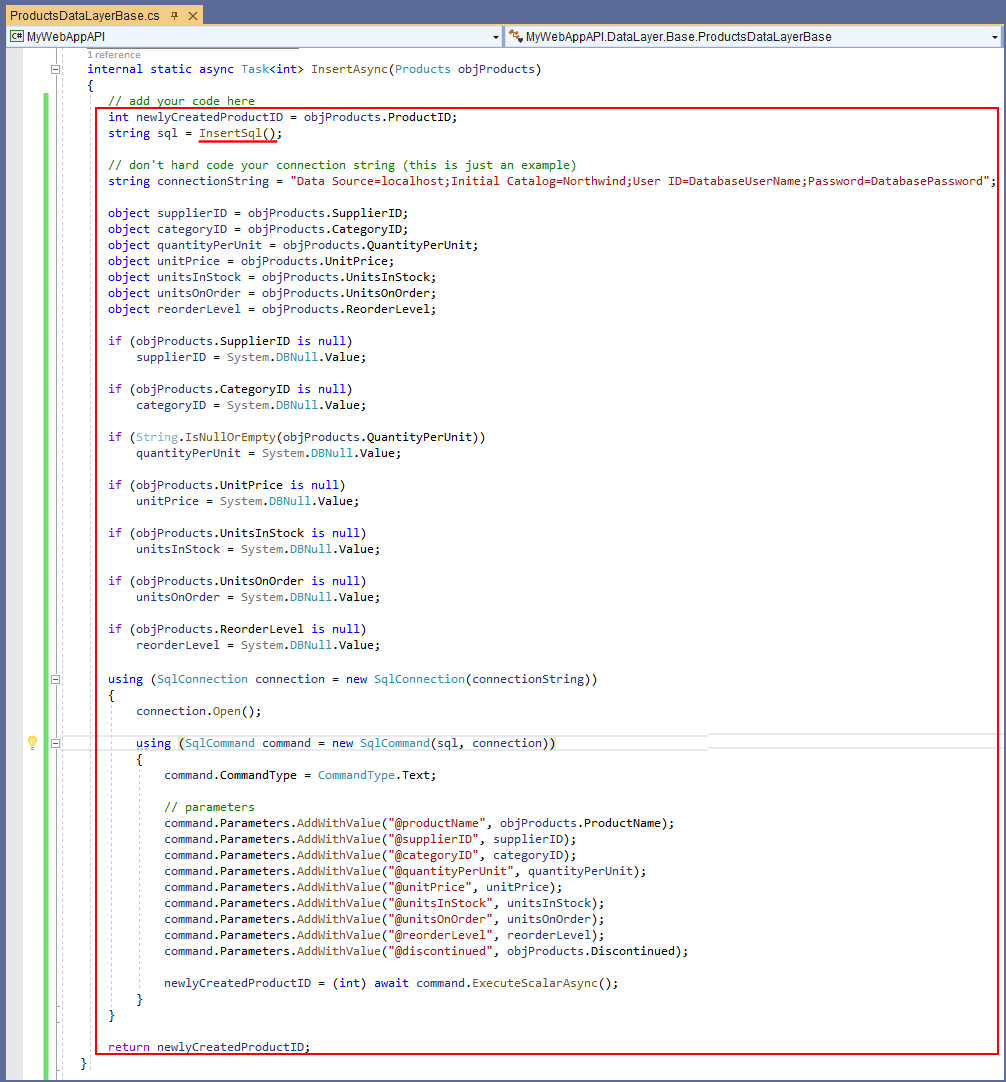
16. We still need to add code in the ProductDataLayerBase.cs
InsertAsync method which will insert the passed values to the database.
Note: Code below is
just an example.
Delete the temporary code:
throw new NotImplementedException();
And then assign the Middle Tier values passed by the UI tier to whatever objects you have. Your objects could be an Entity Framework, or whatever you wish to
use that will interact with your database. Or you can just buy the AspCoreGen 3.0 Razor Professional Plus so that you don't even need to worry about the data layer, it should
generate this part as well as the respective Linq-to-Entities classes (EF Core), or Stored Procedures, or Ad-Hoc SQL (sorry for the marketing spiel).
The example below uses
Ad-Hoc SQL (SQL Script in code) found in the
InsertSql method as underlined below, using the classic ADO.NET.
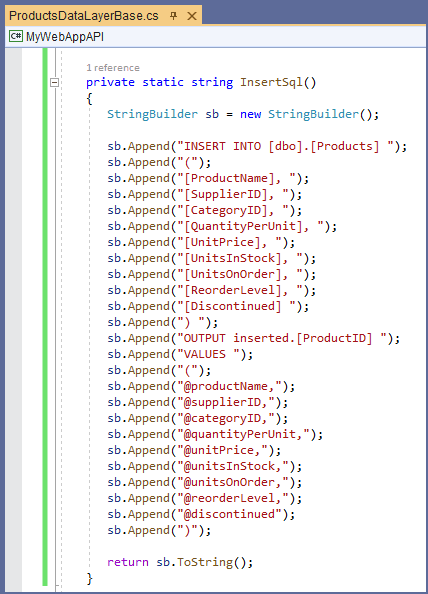
17. Here's the
InsertSql method, make sure to add this method to the
ProductsDataLayerBase class.
Run the web application project and go to the
Products/Products_Unbound Razor Page. Enter values in the text boxes and then click submit. This should add items in the
Products database table.
And we're done.
Last Words:
** One Click. As programmers we develop for one project until we're done or get pulled to another project. This means using the same database over and over again, adding more tables or
fields to existing tables and/or views, or updating them. The "
One Click" feature becomes really handy the next time you generate code for the same database, all you
have to do is click the
Generate Code for All Tables button when working on the same database, and that's it. AspCoreGen 3.0 Razor Express is absolutely free, no need to
register, no pop-ups asking you to buy the Professional Plus edition, no marketing/unsolicited emails whatsoever, yup - it's absolutely free.
As always, the code and the article are provided "As Is", there is absolutely no warranties. Use at your own risk.